Documentation
Database Connection
Connect your project to an external database
Your project's data lives in your database, not ours. Connect any MySQL or PostgreSQL instance and Stellify runs your migrations, queries, and code execution against it — the same database your exported app will use in production.
Overview
Stellify doesn't host databases. Bring one from Supabase, PlanetScale, Neon, or your own server, and enter the credentials in Project Settings → Database.
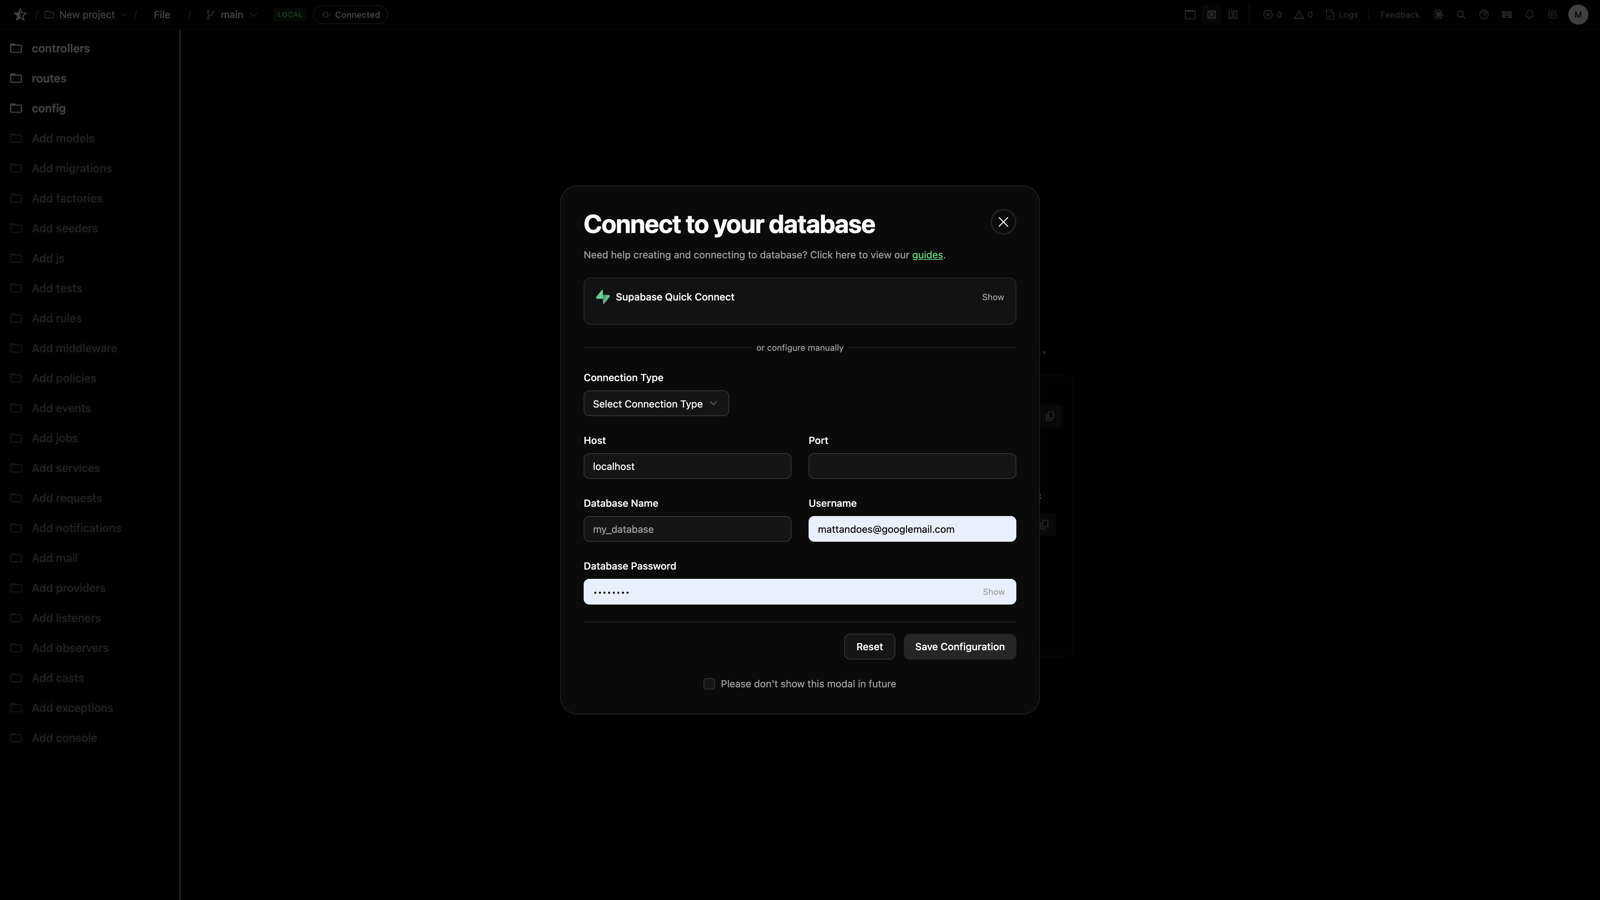
Supported: MySQL 5.7+, PostgreSQL 12+, MariaDB 10.3+.
Until you connect one, your project runs against a managed workspace database — fine for early building, but connect your own before you rely on the data.
Fastest Path: Supabase
The Supabase wizard connects (or creates) a free PostgreSQL database without leaving Stellify:
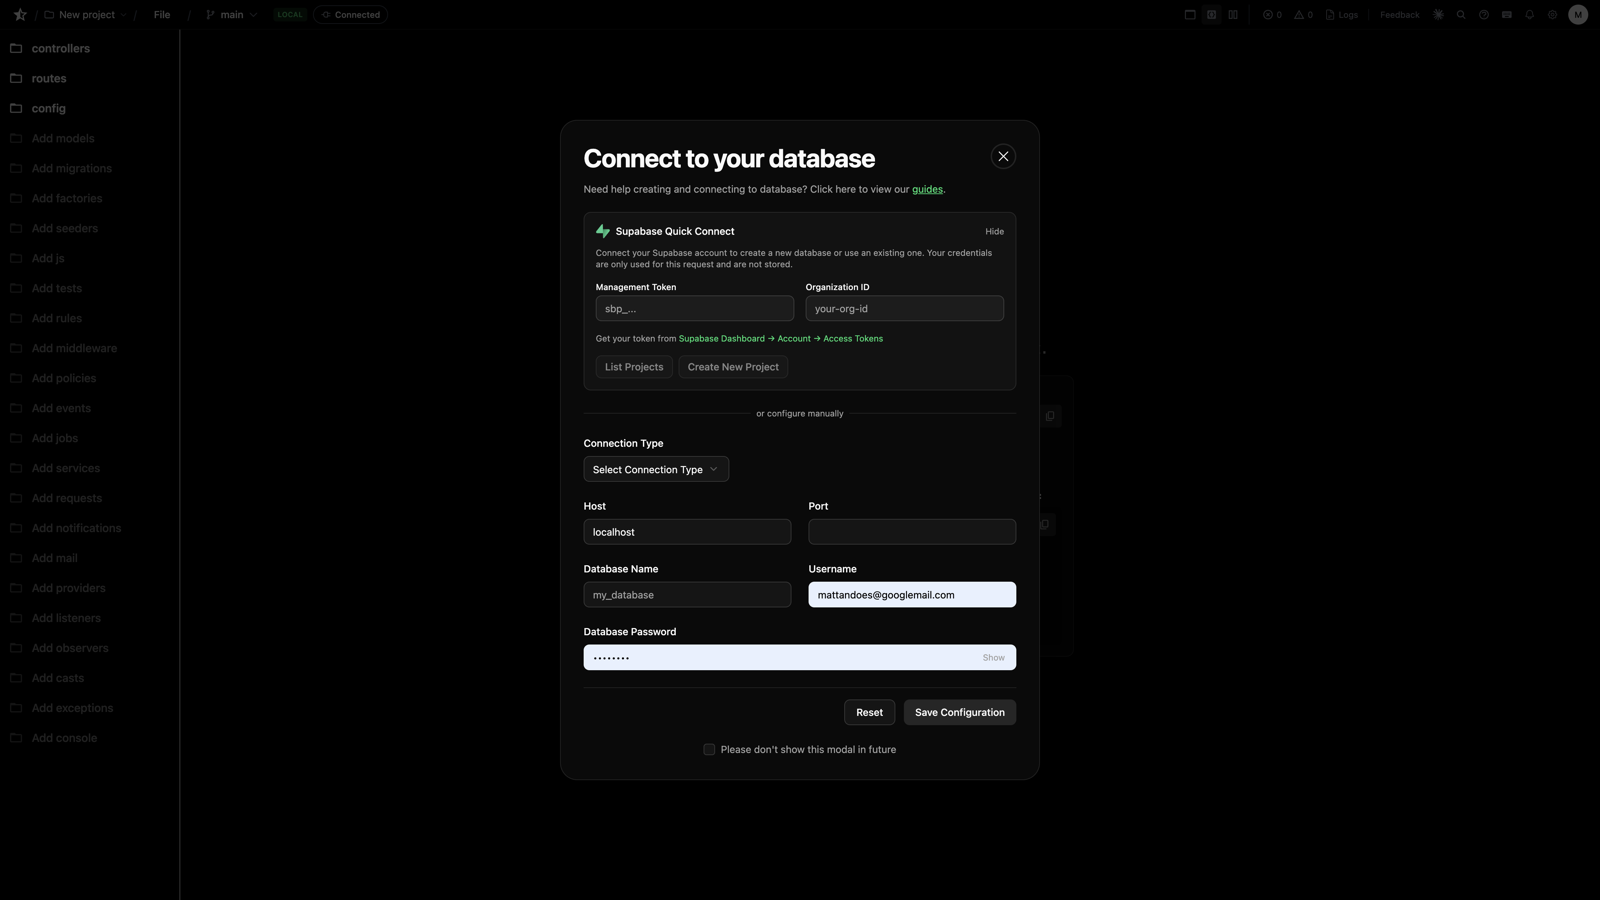
- Open Project Settings → Database and choose Supabase
- Provide your Supabase access token — the wizard lists your existing projects and can create a new one for you
- Pick a project; Stellify pulls the connection details and fills them in
Prefer to do it manually? In Supabase, Settings → Database has the host, port (5432), database (postgres), username, and password — paste them into Stellify's connection form.
Other Providers
Any reachable MySQL/PostgreSQL works the same way: create the database, grab the connection details, enter them in Stellify. For PlanetScale use the Laravel connection preset; for Neon copy the connection string from the dashboard; for a self-hosted server make sure it accepts external connections and the user has full rights on the database.
Test the Connection
Click Test Connection after saving credentials. If it fails, it's almost always one of:
- The database doesn't allow external connections (firewall / IP allowlist)
- Wrong username or password
- The provider requires SSL
Migrations
Migrations are the one kind of code that doesn't run through the normal Run button — schema changes go through the migration runner:
- In the editor: Project Settings → Database → Run Migrations applies pending migrations
- From an agent: the
run_migrationMCP tool applies a specific migration file — agents do this automatically after scaffolding withcreate_resources
Scaffold a resource, run its migration, and the table exists — you can run_code the controller against real data immediately.
Moving Data
Copy Data (in database settings) migrates your project's schema and data from the workspace database into your connected database — use it once when you graduate from the workspace default to your own instance.
Next Steps
- The MCP Server - run_migration and run_code semantics
- Project Settings - Everything else in settings
- Exporting Code - Your exported app connects to this same database
- Previous
- Version Control
- Next
- API Authentication